Creating Car Paint with VRayStochasticFlakesMtl
This page provides a tutorial for using VRayStochasticFlakesMtl.
Overview
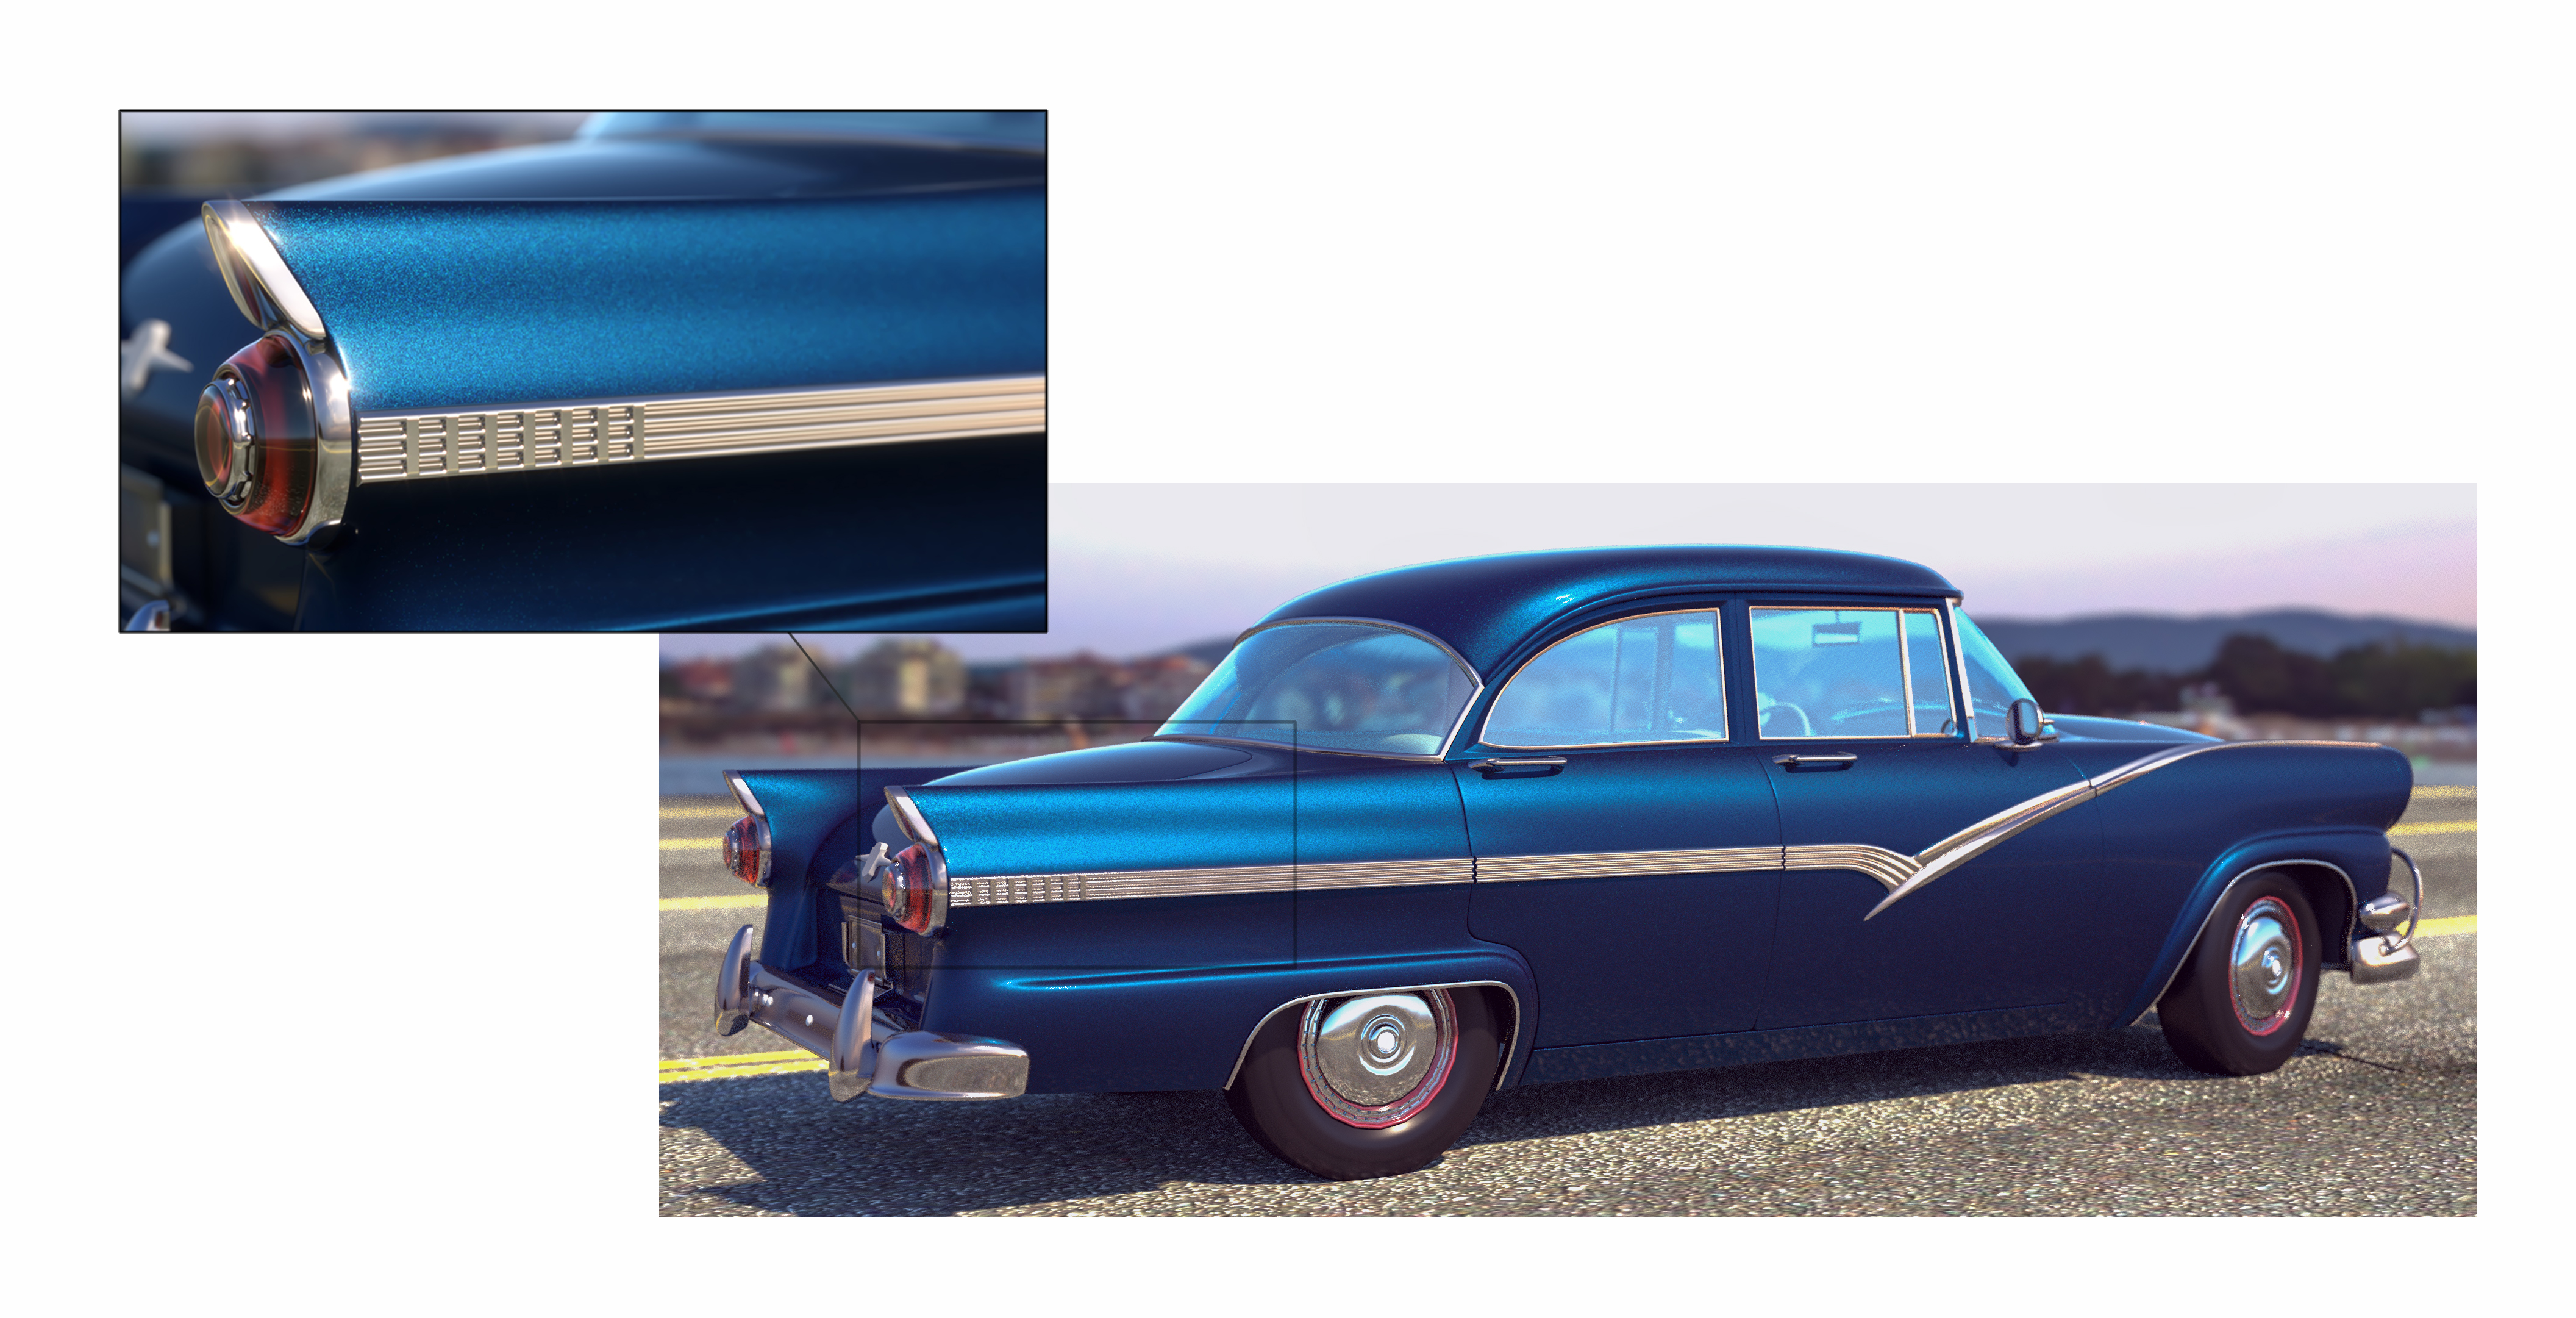
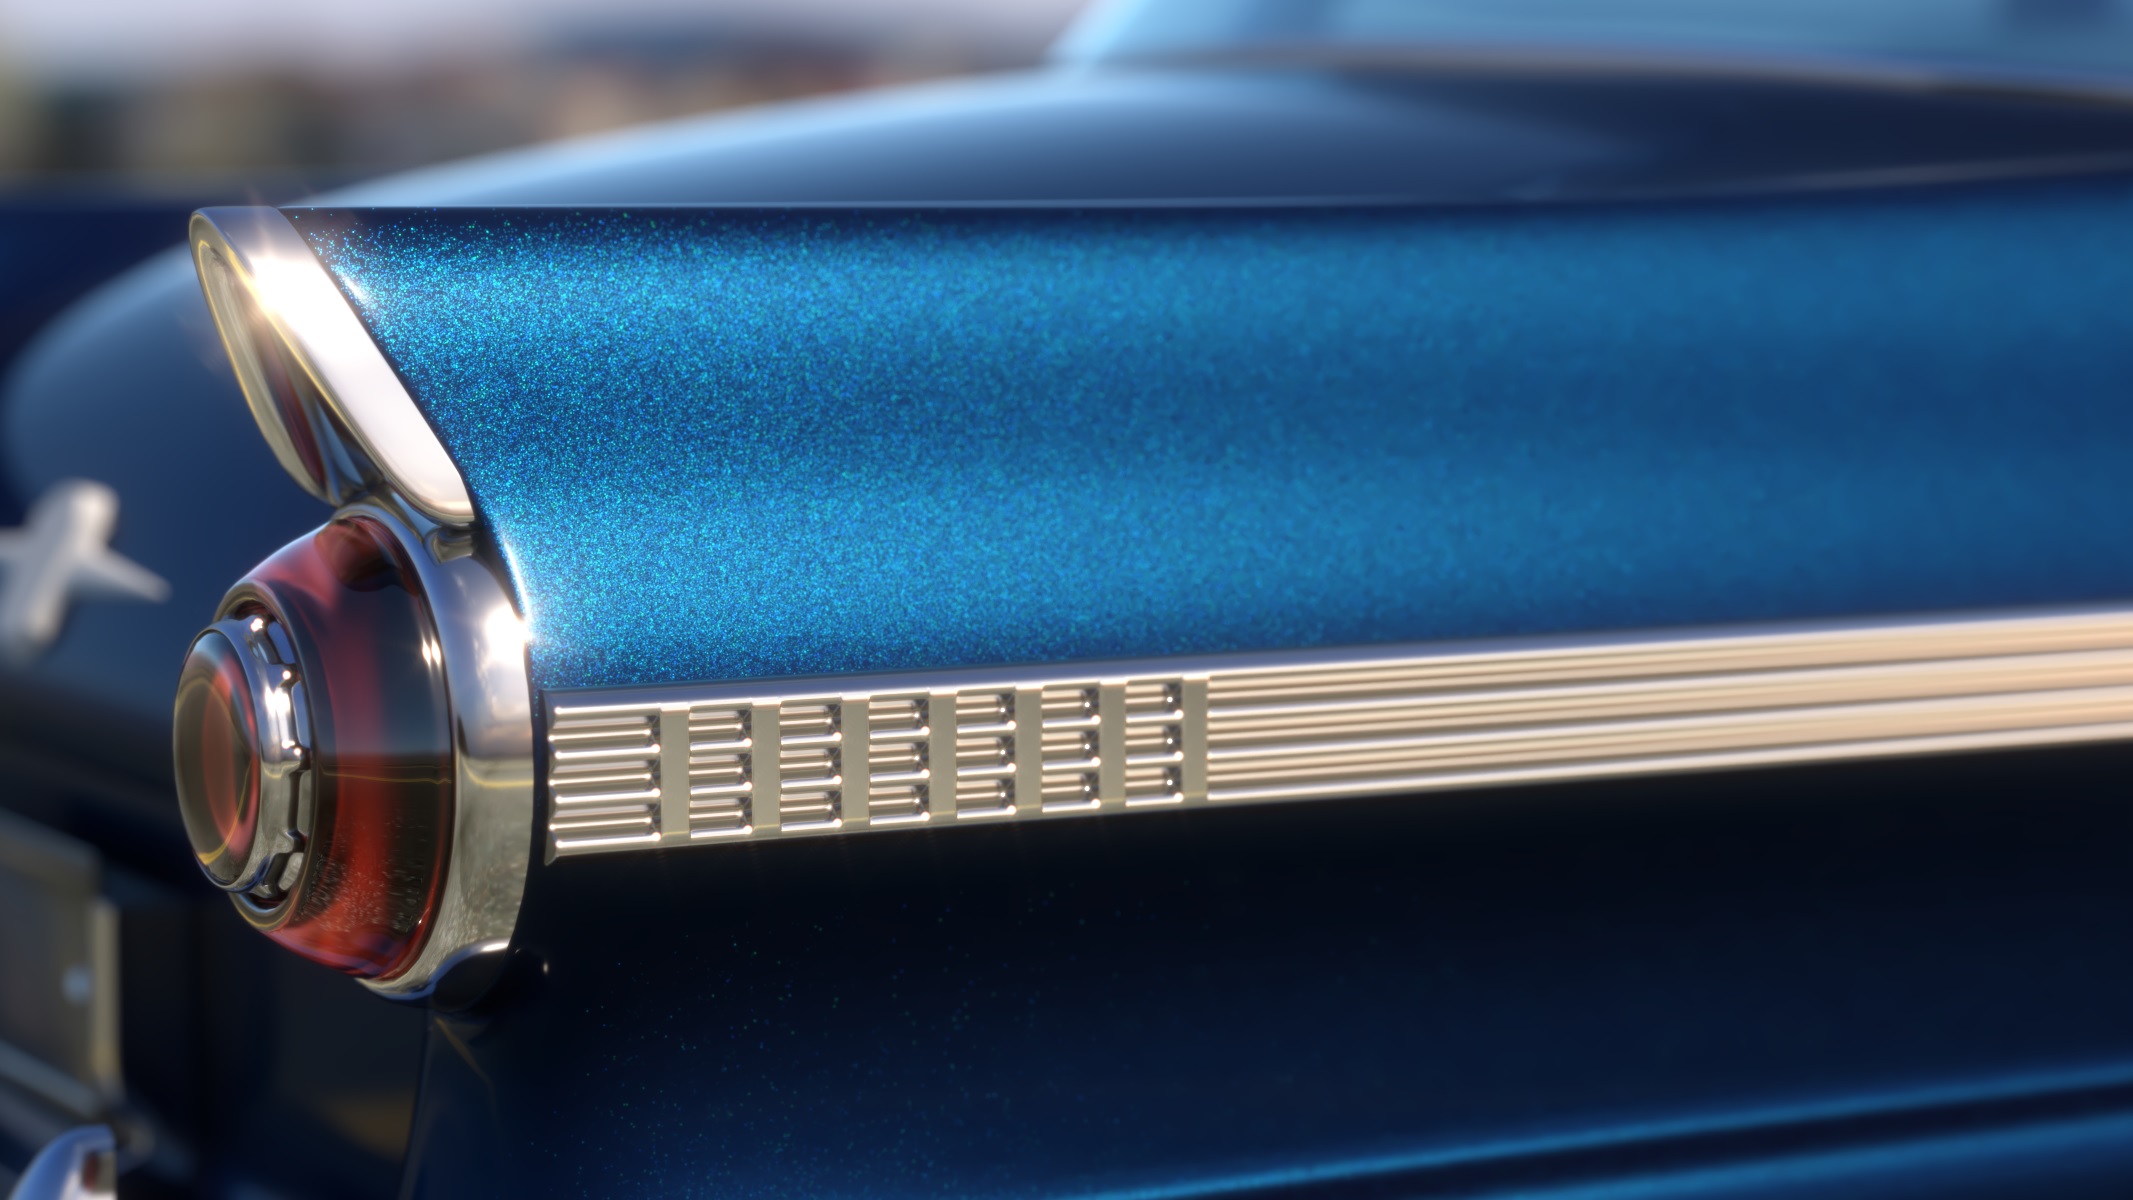
This tutorial explains how to use the VRayStochasticFlakesMtl - a material used for adding flakes to simulate materials like car paints, snow and other glittery materials. Below, we show the workflow for creating a car paint.
The VRayStochasticFlakesMtl can be used separately or together with VRayBlendMtl.
Tutorial Steps
In this tutorial, we discuss some of the ways of using VRayStochasticFlakesMtl with VRayBlendMtl. Here, we create a car paint material.
When you blend the VRayStochasticFlakesMtl with a VRayBlendMtl, it's best to use the flakes on top as a coat. The VRayStochasticFlakesMtl can also be used as a base. The position of the flakes depends on the result you are after.
Creating a Car Paint Material
Part I: Create a VRayStochasticFlakesMtl and a VRayBlendMtl
1. Open the Material Editor and create a VRayMtl and a VRayBlendMtl.
2. Connect the VRayMtl to the Base of the VRayBlendMtl.
3. Create a VRayStochasticFlakesMtl material and name it Flakes.
4. Connect the Flakes to Coat 1 slot of the VRayBlendMtl.
5. Create a second VRayStochasticFlakesMtl material (this one is used for colored flakes) and name it Colored Flakes.
6. Connect the Colored Flakes to Coat 2 slot of the VRayBlendMtl.
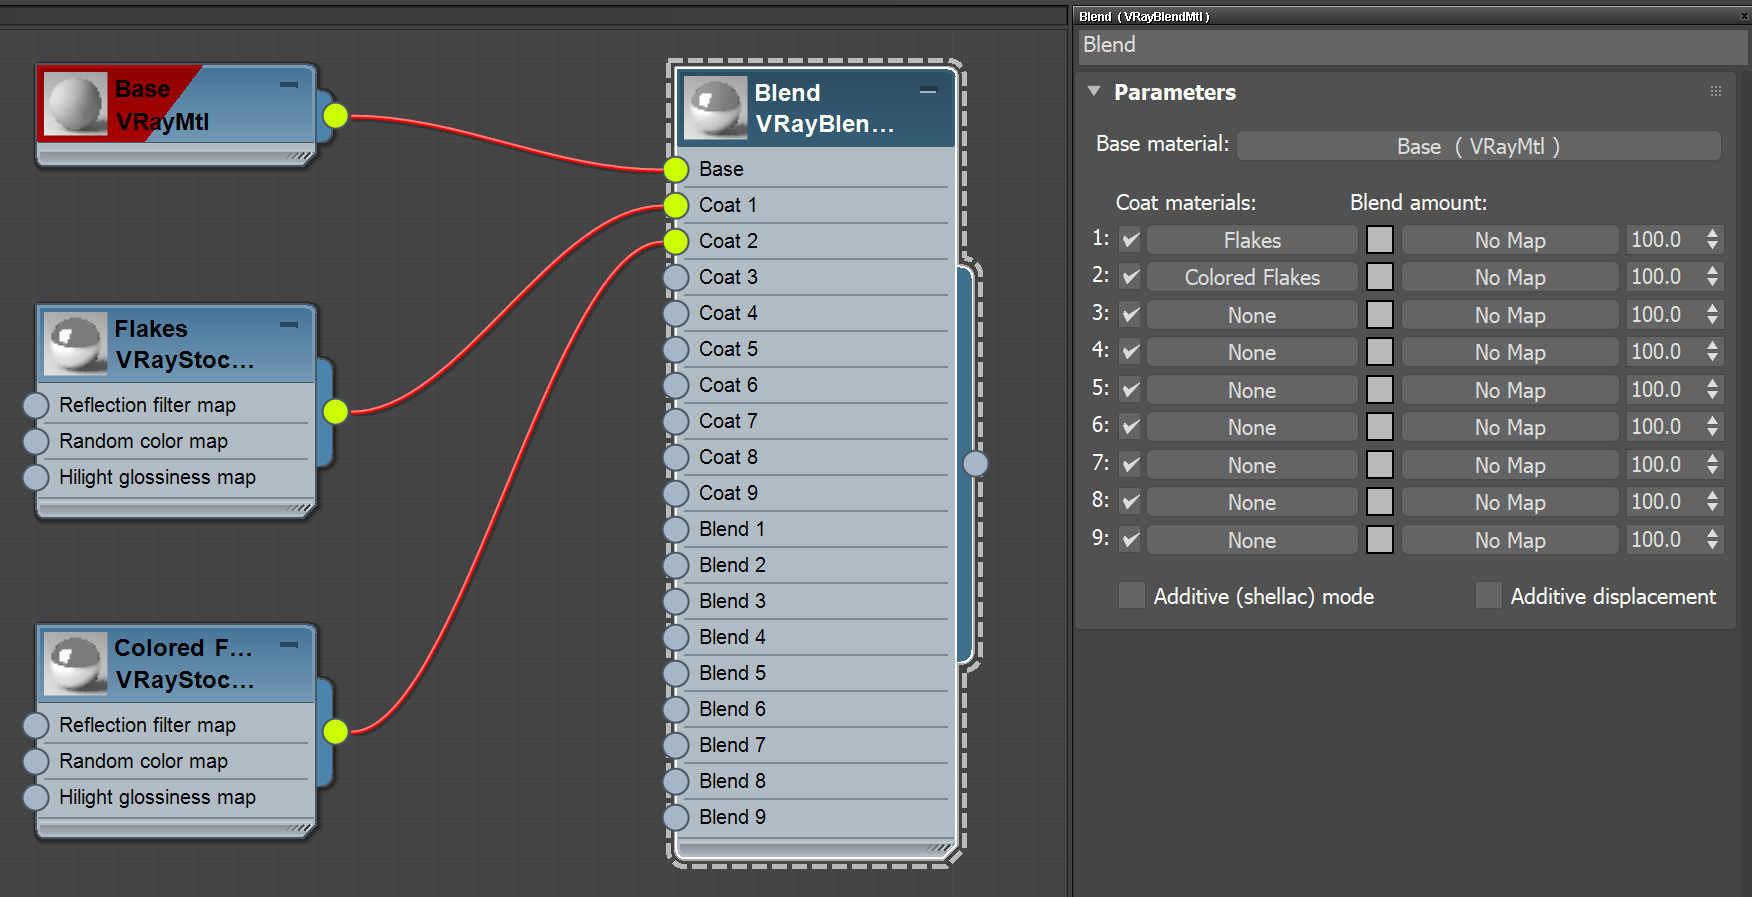
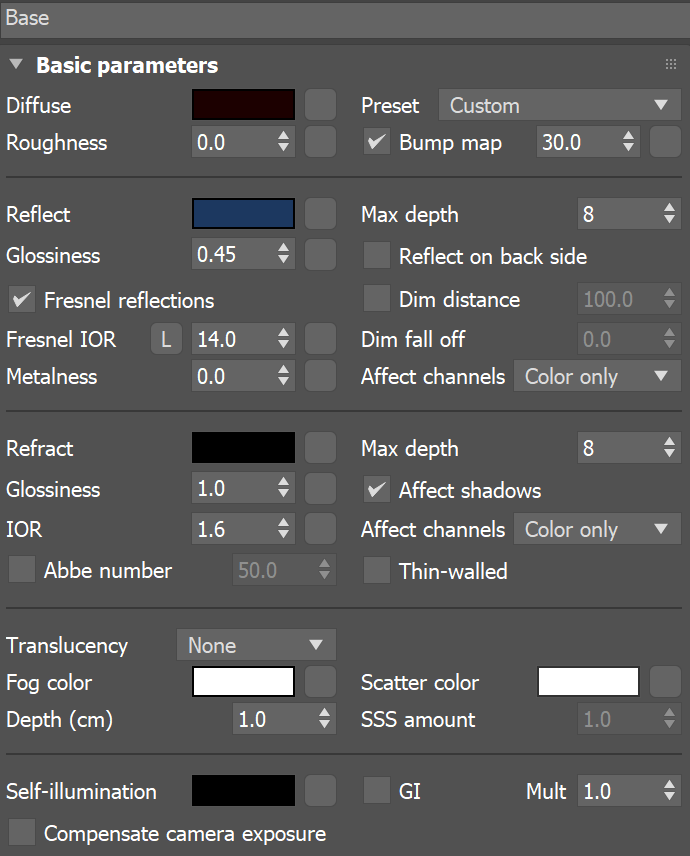
7. Select the VRayMtl and change its Reflection Color to the desired car color. For this tutorial, use R2, G9, B30 values.
8. Set the Glossiness parameter to 0.45 for more blurry reflections.
9. Unlock the Fresnel IOR and increase it to 14.0.
Now that all the materials and textures are created and connected, adjust the settings of the VRayStochasticFlakesMtl.
10. First, adjust the Flakes settings. Select the Flakes material.
11. Adjust the Num flakes. There is no perfect value. You have to experiment with different values to achieve the desired result. In the current case, a value of 10 000 works well.
12. Adjust the Highlight glossiness to make the highlights blurrier or glossier. In this case the value of 0.6 works fine.
13. Set the Blur angle to 10.0 to blur the flakes.
14. Change the Reflection filter color if you want to tint the reflections. Set it to blue (R0, G9, B20) for the purpose of this tutorial.
15. Change the Мapping type to Explicit UVW channel, given your geometry has proper UVW mapping. Alternatively, you can also use Triplanar from object XYZ.
- In case you are using Explicit UVW channel, set the Flake scale to 1.0. (however, in the current tutorial, set it to 5.0)
- In case you are using Triplanar from object XYZ, set the Flake scale to 0.01.

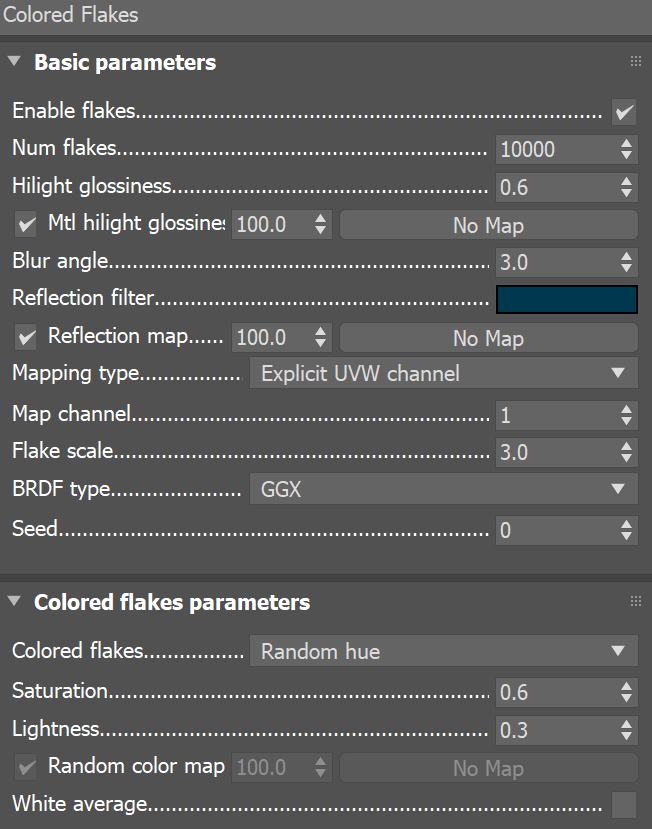
Some car paints have different metal flakes used to blend the paint. We can create colored flakes using the Random hue option from the Colored flakes rollout menu.
16. Now adjust the Colored Flakes. Select the Colored Flakes material.
17. Adjust the Num flakes. In this case, set it again to a value of 10000 just like you did for the Flakes material.
18. Adjust the Highlight glossiness to make the highlights blurrier and glossier. In this case the value of 0.6 works fine.
19. Set the Blur angle to 6.0. This blurs the flakes.
20. Copy the Reflection filter color from the main flakes material.
21. Set the Flakes scale to 3.0.
22. Set the Colored flakes to Random hue to create the colored flakes.
23. Set the Saturation to 0.6 to desaturate the colored flakes.
24. Set the Lightness to 0.3.
25. Assign the VRayBlendMtl to the geometry.
Part II: Create a clear coat for the car paint
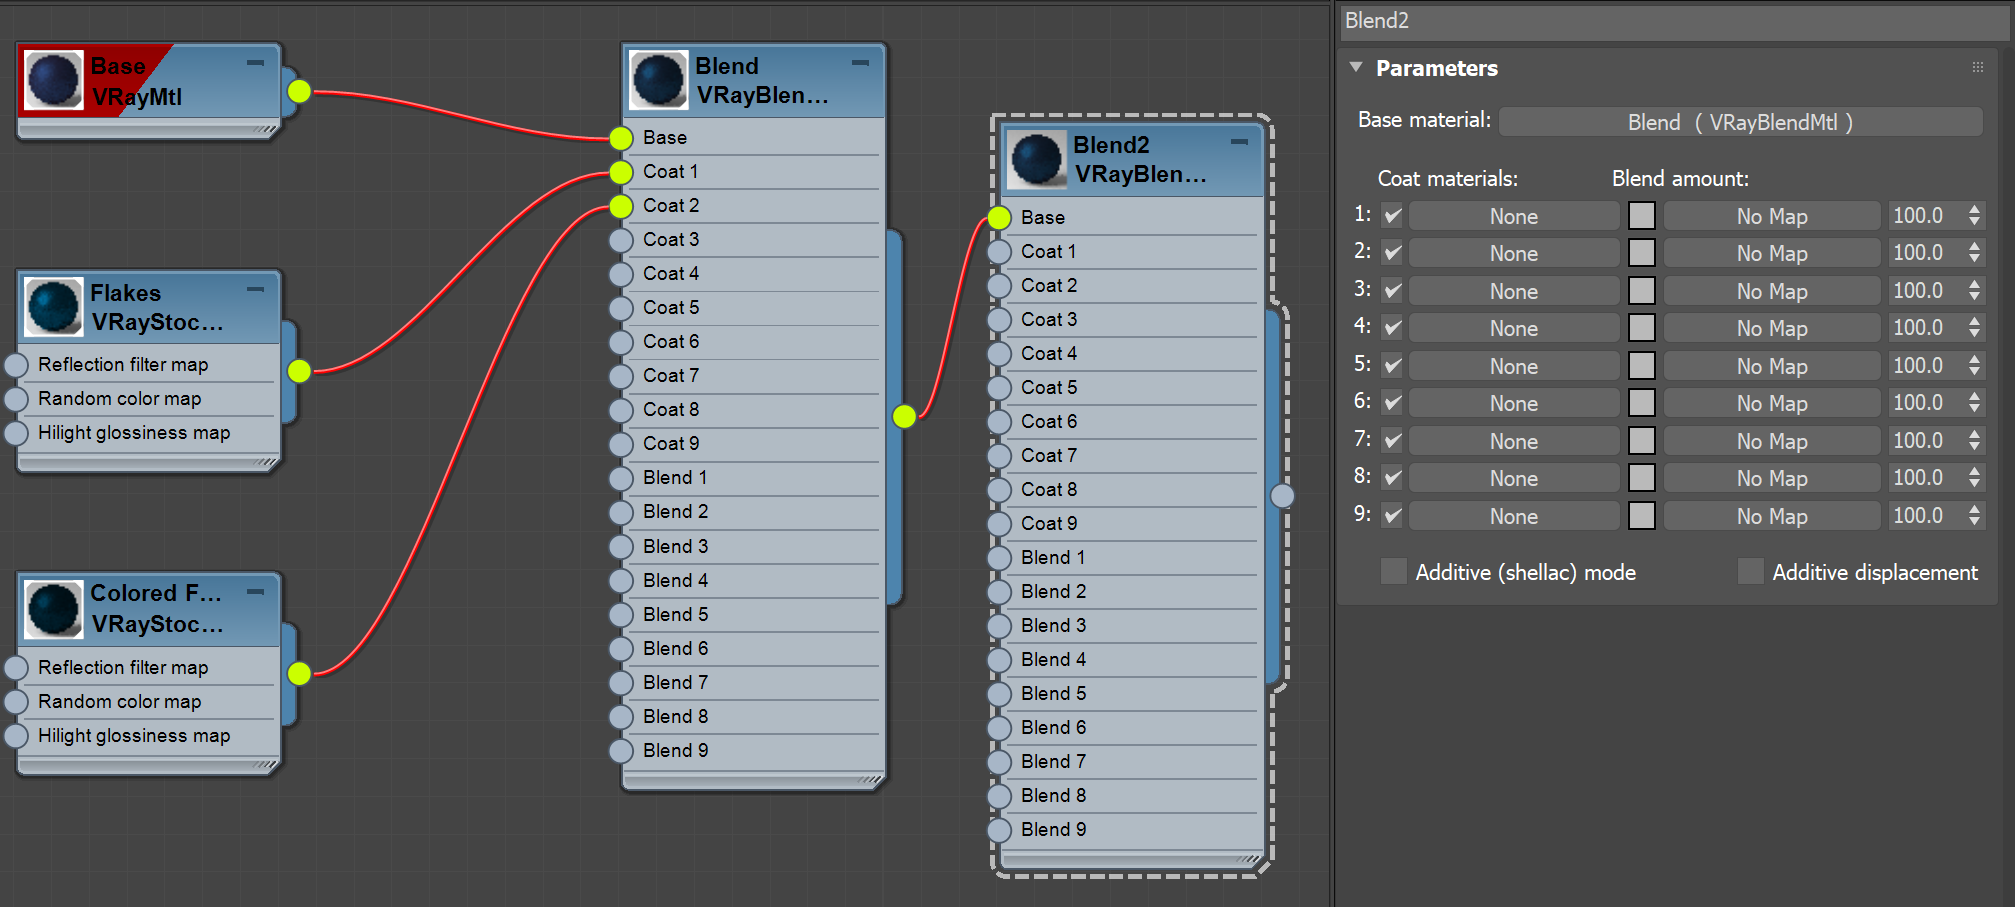
1. Create a new VRayBlendMtl and name it Blend2.
2. Connect the Blend1 material to the Base of Blend2 as shown.
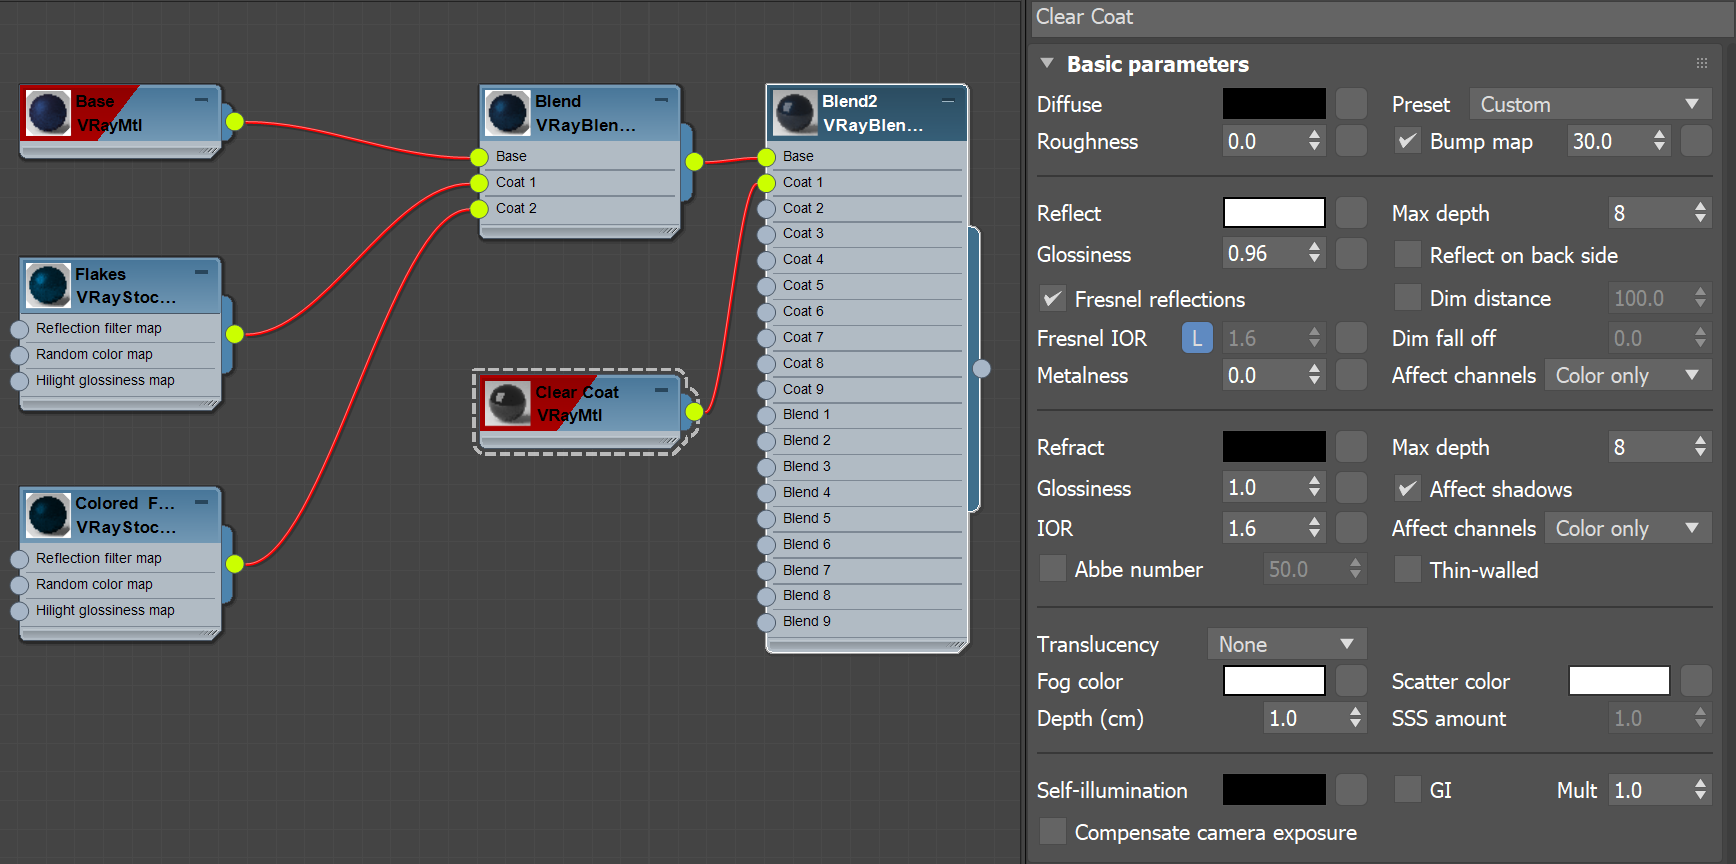
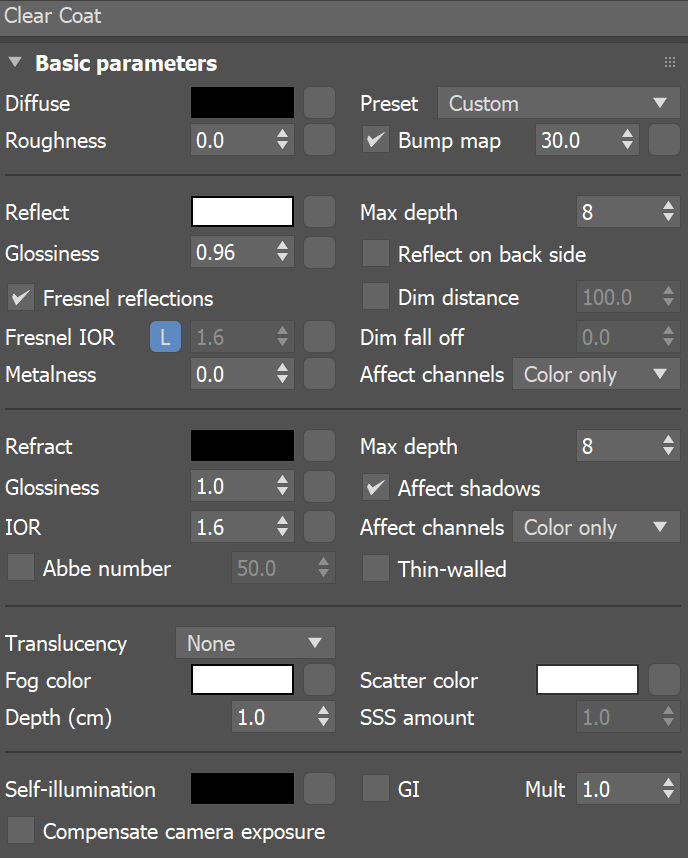
3. Create a new VRayMtl to serve as a clear coat and name it Clear Coat.
4. Connect it to Coat 1 of the Blend2 material.
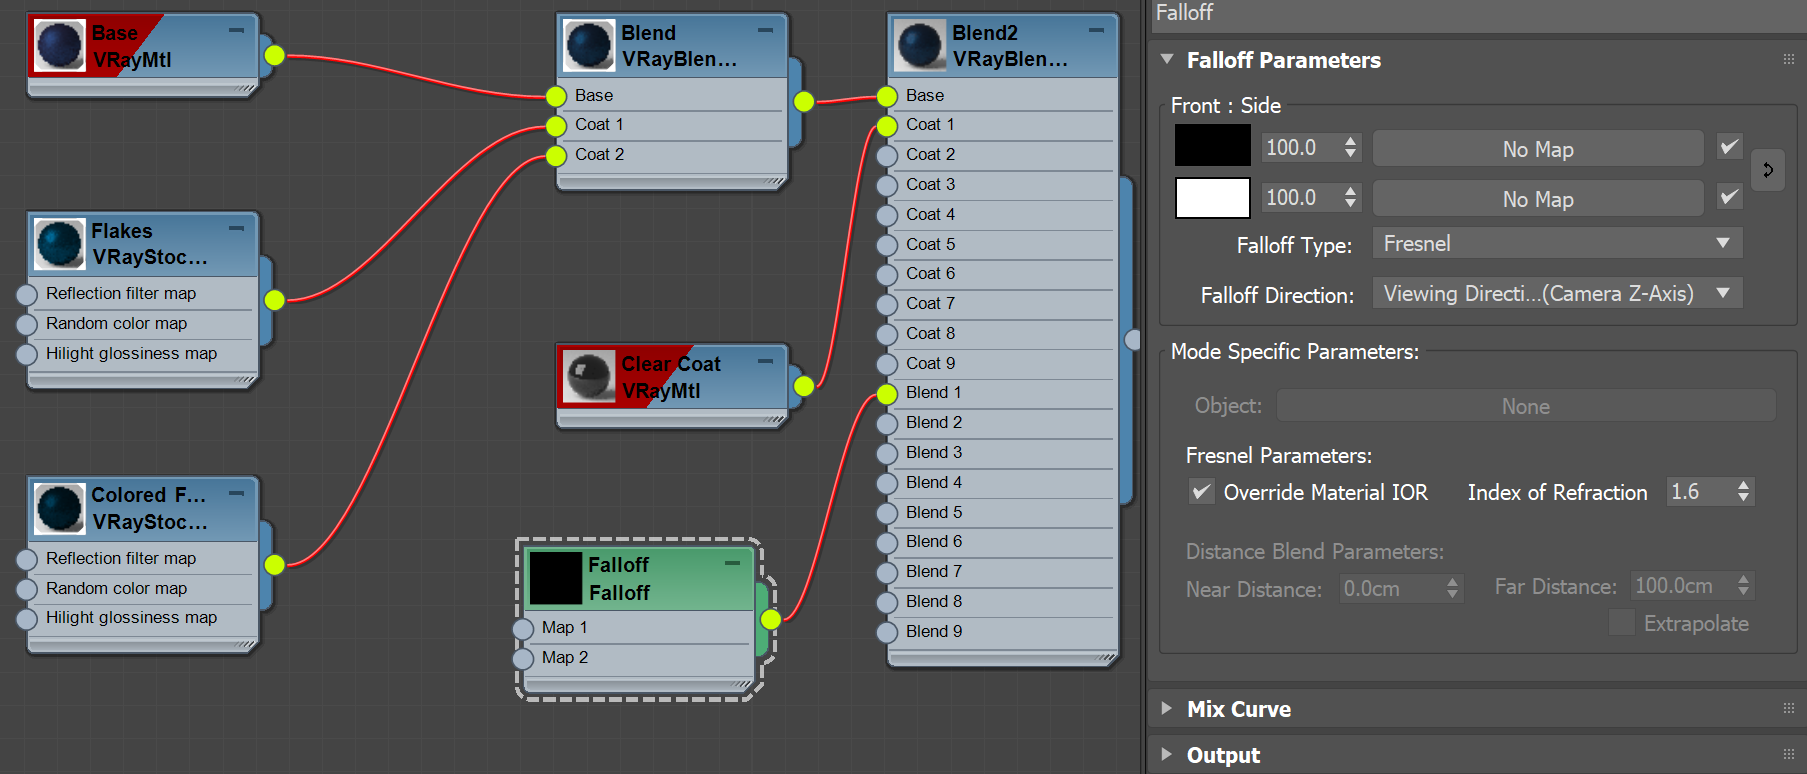
Use a Falloff texture to blend the clear coat with the Blend1 material.
5. Create a Falloff texture. Set the Falloff Type to Fresnel.
6. Connect the Falloff texture to the Blend 1 slot of the Blend 2 material.
7. Select the Clear Coat material and open its settings.
8. Set the Reflect Color to white.
9. Lower the Reflection Glossiness to 0.96.
10. Assign the Blend2 to the geometry
11. Render.
Result